Latest

家里进贼了

很衰。把房间弄到乱七八糟。
准备要洗的臭衣服还有干净的衣服全部都倒到床上去。
宝贝寄放我家的行李全部都被打开倒到完出来。

电脑被偷走了。
相机被偷走了。
新买的 GPS 被偷走了。
PSP 被偷走了。
Hard disc 被偷走了。
装电脑用的 Backpack 被偷走了。

损失超级无敌霹雳惨重。。。

唉。。。
电脑偷走了没关系,可以买新的。可是里面的照片,音乐,文件。。。不见完。拿不回来了。
可恶死了。衰死了。

大家,准备好,我会跟你们要回我们以前的照片的。
还有,有什么旧歌还是好歌,都 send 来给我。尤其是管乐的,上网很难找。

谢谢。

How to buy an external hard disc?

DISCLAIMER: This guide is based on my personal experience and knowledge. Correct me if I am wrong, on the comments section. And also, this guide is meant for basic consumer, and more towards decision making than technical comparison. Therefore, this guide will contain minimal technical knowledge / comparison.

Summary

For people who just wanted to know the “how” part, read this section.

How do you plan to use it?
Transfer files, traveling with large number of files. –> 2.5″ portable hard disc
Backup my files, stays on the desk all/most of the time. –> 3.5″ external hard disc

Do you…
Need one? –> Get the one with just enough space
Want one? –> Get the largest space available in the market

Brand? Get only branded ones. Avoid unknown brand.
Popular brands: Western Digital (aka WD), Seagate, Toshiba.

Extra features? Auto-backup, encryption etc these features good?
Not recommended. However if you liked the design, and it only comes with these extra features, then go ahead and buy one, and try to get rid of them later. Or live with it.

For people who wanted to know more about the comparison, read on.

Introduction

As a techie among my friends, often people will come to ask for my advise when they want to buy an external hard disc for themselves. Most of the time, people will start with “Hey, is (insert brand name here) hard disc worth buying?”, or “Hey, I found (insert model here) cost (insert price here), do you think I should buy one?”. This kind of questions is really hard to answer, not without some further clarification.

Hard Disc Type

Most people are unaware, there are more than one size of hard disc. People will think the 2.5″ portable hard disc is THE ONLY external hard disc on the market. Why? Because that’s what all those IT shops are pushing towards consumers. When people goes into an IT store and say “I want to buy an external hard disc”, the shop keepers will, by default, show you their collection of 2.5″ portable hard disc.

This is WRONG.

There are, in fact, two sizes of hard disc.
The existence of 3.5″ hard disc seems to be known only among techies. I wonder why.

Pros & Cons

After knowing the existence of 3.5″ external hard disc, most people would ask, “Its so big! Why would anyone want to buy this?”. Simple answer: It’s cheaper.

Price is not the only factor. There are some more pros & cons when comparing the 2.5″ and 3.5″ external hard disc.

Physical Appearance / Usage
The 2.5″ portable hard disc is small and portable. It usually is powered by USB only. Occasionally, one USB port may not be enough to power up one unit, this is why most 2.5″ portable hard disc comes with 2 power input. This situation often occur when using battery-powered netbook / laptop.

The 3.5″ external hard disc is big and bulky. It comes with a power adapter, and must be powered by external power outlet. As it is powered by external power, you won’t need to worry about under-powered hard disc. However, it is advised to unplug it during thunder storm.
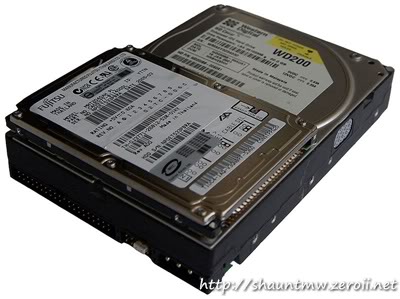

Size comparison of 2.5″ and 3.5″ external hard disc.
(Image gotten from Wikipedia)

Disc Space
3.5″ usually have a larger capacity than their 2.5″ counterpart.
At the time of writing this, Western Digital offers:
3.5″ external hard disc: 500GB ~ 3TB
2.5″ portable hard disc: 250GB ~ 1TB

Read / Write speed
3.5″ usually have a faster speed than their 2.5″ counterpart.
3.5″ external hard disc spins at 5,400 up to 10,000 RPM.
2.5″ portable hard disc spins at 4,200 up to 7,200 RPM only. And the higher RPM ones usually have less disc space.

However, this won’t be a major issue since most people only use external hard disc to store data, not installing programs and run on it.

Transfer speed
In terms of transfer speed, they actually depends on the medium of transfer.
Common type of transfer interface: USB, FireWire, and eSATA.

USB: It is so common, that it is so hard to find any computer without USB port nowadays. Unfortunately, when comparing with the less common medium, it is the slowest. And also, not all motherboard support booting from USB device. Do not worry though, it is good enough for common folks like us.

FireWire: People who are getting this are mostly Mac users. This is way faster than USB, but is less common for PC users. Most Mac machines now can even boot from FireWire, which makes it a good alternative storage for a second OS.

eSATA: This is usually for people who are techies themselves, whom people ask them to troubleshoot their computer. eSATA is useful when a computer’s internal hard disc had failed, you can boot from an external hard disc using the computer’s internal SATA adapter. If your computer had an eSATA port, you also could benefit from the fast transfer rate.

How my summary works?

First question will usually determine the actual size of hard disc you need. If you need a portable one, you will definitely need a 2.5″ portable hard disc. If you need only a static backup, my recommendation is to use a 3.5″ external hard disc, to enjoy its large capacity and lower cost. You could, get a 2.5″ portable for this purpose as well, but usually not worth the cost (since you aren’t utilizing 2.5″ portable’s only advantage – its portability).

The second question is my own opinion.

If you “need” it, the just get the one that is just enough for your need. Don’t bother going for the maximum size available. Why? Because the price of hardware is constantly dropping. It would be a waste to spend the extra cash, to buy something that you won’t be fully utilizing, and will price-drop in the future.

However, if you just “want” it, then go ahead and get the maximum size available in the market. Why? Because in the future, where technology advances and newer, larger hard disc came out:

(1) Your current one still have so much space, so you decide not to get another one until it goes red, which saves you money for a very long period, or;

(2) You resell your current one and get the latest one, where in this case since yours aren’t outdated yet, its resale value is retained better.

Why not recommend those extra features?
I wouldn’t recommend buying a hard disc because of it. You don’t usually need these fancy features, and even if you do, there are many free alternative on the web. These features eat off the actual storage space of the hard disc itself, and may not be compatible with every computer. It may affect the performance of the hard disc too. But, if you like the design of the hard disc, but it only comes with these extra stuff, you can still go ahead and buy it, and try to get rid of them later. Or live with it.

References:

http://www.wdc.com/en/products/catalog/?segment=2
http://en.wikipedia.org/wiki/Hard_disk_drive#Market_segments
http://en.wikipedia.org/wiki/File:Comparison_of_3.5_and_2.5_inch_hard_drives.jpg

Kokoro (心) – Kagamine Rin

孤独な科学者に 作らねたロボット
出来栄えを言うなら “奇迹”
だけどまだ足りない 一つだけ出来ない
それは「心」と言う プログラム

几百年が过ぎ 独りで残された
奇迹のロボットは 愿う
知リタイ アノ人ガ 命ノ 终リマデ
私ニ 作ッテタ 「ココロ」

今 动き始めた 加速する奇迹
ナゼか ナミダが 止まらナい…
ナぜ 私 震える? 加速する鼓动
こレが私の望んだ「ココロ」?

フシギ ココロ ココロ フシギ
私は知った 喜ぶ事を
フシギ ココロ ココロ フシギ
私は知った 悲しむ事を
フシギ ココロ ココロ ムゲン
なんて深く切ない…

今 気付き始めた 生まれた理由を
きっと独りは寂しい
そう、あの日、あの时 全ての记忆に
宿る「ココロ」が溢れ出す

今 言える 本当の言叶 捧げる あなたに
アリガトウ この世に私を生んでくれて
アリガトウ 一绪に过ごせた日々を
アリガトウ あなたが私にくれた全て
アリガトウ 永远に歌う

孤独的科学家 制作出来的机器人
心血结晶就如同是 “奇迹”
可是依然不完美 缺少了一个部分
那就是称为『心』的程式

几百年过去 独自被留了下来
奇迹机器人的 愿望
好想知道 那个人 在生命的最后终点
为我 制作出的 『心』

现在 开始启动了 加速的奇迹
为什么 眼泪会 停止不住呢…
为何 我 颤抖着? 加速地悸动
这就是我所期盼的『心』?

不可思议 我的心 我的心 不可思议
我了解了 何为喜悦
不可思议 我的心 我的心 不可思议
我了解了 何为悲伤
不可思议 我的心 我的心 不可思议
多么深刻痛切…

而今 第一次发觉 诞生的理由
一个人一定是如此寂寞
那样、那日、那刻 全部的记忆
从寄宿的心之中流溢而出

而今 能够说出 真正的言词 献上 对您的
谢谢 让我诞生在这个世界
谢谢 一起度过的每个日子
谢谢 您赐予我的全部所有
谢谢 永远地歌唱

下载网址:http://hotfile.com/dl/121704073/1004fc7/Kokoro.mp3.html
上面网址不行的话,留个言我再上传。不然可以去 我的 Multiply 找。

昨天回家忘记锁车,今天早上上班时候上车,就看到抽屉的东西都被乱七八糟弄出来了。
然后。。。发现我的 GPS 不见了。

进贼了。显。
要买过了。。。

我的 new desktop 计划要再延迟了。。。

Disassemble Guide: How to clean the fan for Acer Aspire 4937G

I’ve been experiencing auto-reboot recently again. Due to overheat I guess.
It’s been half a year since I last clean my laptop fan.

Normal users should clean their fan once a year. But for power users, you may need to clean them more frequently, like twice a year. (like me :S)

DISCLAIMER: If you really wants to disassemble your laptop, DO AT YOUR OWN RISK! I do not, and will not, bear any responsibility of you messing up your own laptop just because you’ve been reading my guide. This is just a basic guideline for experienced users with hardware knowledge. It is advised to send your set to proper technician if you do not feel confident, or do not wish to take the risk. Also, note that opening your laptop case WILL VOID YOUR WARRANTY! (Although it doesn’t really matter, Acer’s after-sales service sucks anyway.)

DISCLAIMER 2: This post is more than 2 years old. Unfortunately, my laptop has long gone, and I am not an Acer technician. Follow this guide at your own risk, and note that I may not be able to answer most of you questions now as I can’t really recall much details anymore. Sorry.

Ok here we go…


First of all, these are the tools you need:
– A small plus (+) sign screwdriver, but not too small. About the size of the screws under your laptop. Preferably magnetic.
– A small minus (-) sign screwdriver, about the size of above plus size screwdriver. Useful for prying open some casings.
– A really small minus (-) sign screwdriver. Useful for opening small plugs.

These are the tools I used this time. (With my Nokia N70 beside for size comparison)

Before you start, shut down your laptop, take out the battery and let it cool down for a while if you’ve been running it for some time. It will be dangerous to operate a hot laptop.

Flip to the bottom of the laptop, and take out all the screws as shown.


Click to see enlarged picture

Next, open the 3 panels to expose the Harddisc, RAM, and WiFi card. Take out the 2 side cover of the LCD as well.

Take out more screws under it as shown.


Click to see enlarged picture

Take out the harddisc and RAM as you normally would. Slide the DVD-drive out from the inside. Take out the PCI dummy if you have it. Remember how they connect the WiFi card. It’s white on top and black below. It is advised to take a picture before pulling the plug, so that you can remember how to put them back when you’re done.

Take out the WiFi card when you’re done. Now, flip the laptop, and carefully open the LCD screen. Since the bottom are unscrewed, you may need to hold the sides of the top cover to avoid breaking the top casing, specifically left side (right side have 3 screws beneath, you can worry less.)

Next, carefully pry open the speaker panel.

Once you’re done, you may slot out the keyboard, to reveal the underneath. Take out more screws, and on top of that, plugs. Use your very small sized minus sign screwdriver to open up small plugs before pulling it out.


Click to see enlarged picture

After all the screws and plugs, take out the speaker and quick-launch board. Time to remove the LCD. Take out 3 more screws under the speaker board, and carefully pull out the black and white wire from below. (I forgot to take a picture, so I will just use back the previous ones.)


Click to see enlarged picture

Take off the LCD and put it aside. Carefully pry open the top casing to reveal the motherboard underneath. This is going to end soon. Some little more screws and plugs.


Click to see enlarged picture

Carefully slide out the motherboard. Flip it over. You’ve finally reached the fan! Take out more screws.


Click to see enlarged picture

Flip over the fan, and clean the layer of dust blocking the ventilation.

It is not necessary to clean the dust in the fan itself, although you may do so if you wish. I don’t do it, since it involve much much smaller screws, and it requires a lot more concentration and proper tools screwing back in.

When you’re done, you generally had done this to your laptop.

Alright, you can start to read this guide in reverse. And wish you good luck. =)


Any questions, just leave me a comment, I will try to answer them if I can. But do not expect too much from me, I am not Acer technician.

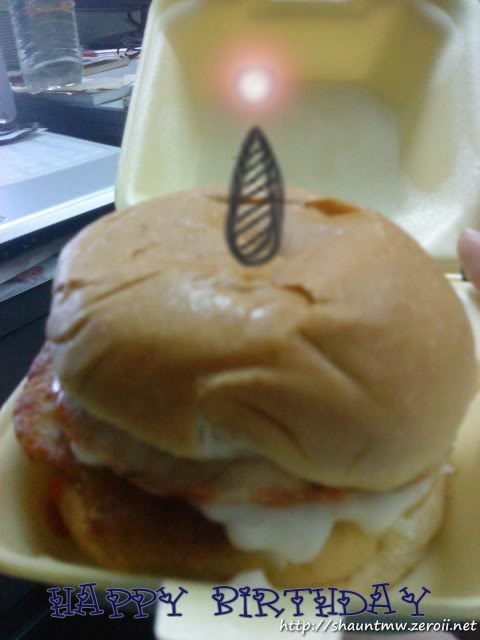
谁说生日一定要蛋糕?

粉红?浅紫?傻傻分不清楚~

由于上次只买到一个蓝杯,送给宝贝了。
我自己也很想要一个蓝杯,所以在卖蓝杯的最后一天的最后一个晚上才去排队买。

可是。。。
去了 SS2 的 McD 他们 sold out 了。。。
然后去附近 Bandar Utama 的,也是 Sold out 了。。。
然后去 Damansara Uptown 的,也是 habis。。。
然后去 Mutiara Damansara 两间,也是完了。。。
然后去更远一点的。。。也是没有。。。
打电话去问,他们也是说没有了。。。
来来去去尽了 7~8 间 McD。。。全程用了两格油,
走了大概 20km,还下起了很大很大的雨,要绕路回家因为 banjir。。。

结果。。。黄天不负苦心人,我最后还是没有买到。 =(

谢谢宝贝一直说要送回给我。可是我知道你比较喜欢也比较适合蓝色啦~
你喜欢我就开心了。没有买到蓝杯也没关系的。


才说到没买到蓝杯很显,第二天就轮到卖 pink color 的杯了。
我听颜色看 catalog 其实一开始没有很想要的,
因为我本身就很讨厌 pink color 的东西(除了 sirap bandung 我就喜欢)。

因为同事们要去买杯要去 McD 午餐,所以我也跟住去咯~

本来我只打算去吃吃就算了,可是到那边了的时候。。。
排队超级长的!原来这里很多很多人都要买杯。
看到 counter 那边的杯半打半打卖掉的。 = =+
然后哦。。。当我看在排队看到旁边坐着的人桌上的杯过后。。。

Ei~其实也没有很 pink 很难看嘛~
比较像是浅紫色的嘛~

看了马上就变蛮喜欢掉,就马上 on the spot 改变主意买了个 pink color 的杯。

哈哈~


明天是其中一个世界末日了。
不过不是爱你的终点~

两个乡巴佬

小乡巴佬最后一年最后的考试完了,房子也停租了,
所以要大乡巴佬帮忙载一大堆货下去,暂放大乡巴佬的家,
然后自己带一小堆货回家。

因为星期二是 Wesak Day 假期,
大乡巴佬于是向大城市公司请假一天,
就有了连续四天休息日。陪小乡巴佬在大城市逛逛玩玩。


星期六,大乡巴佬从大城市出发,去小乡巴佬的大学乡下去。
上货,超级多的。还好小红长大变大黑了,不然根本载不完。

在乡下停了一会儿,剪了一头乡巴头,吃了一下乡巴 McD,
就准备回去大乡巴佬的城市去了。

真是的,剪完头发了才知道,那边那个理发店的帅哥们,很多基佬。。。
大乡巴佬的头发被一个不懂是不是基佬的帅哥摸了半天。
= =+

蓝色的可口可乐杯很漂亮。

不愧是乡巴佬们,容易被这种城市里普通的东西吸引。


星期天,两个乡巴佬去了一间很大很大的百货公司。
本来打算在大城市的戏院看看戏的,
可是,好长的人龙哦。。。超级无敌懒惰排队的乡巴佬们,就决定回家,
试试 “新潮” 的网上购票。

其实也才逛了两个小时,就累到要死了。
大城市的百货公司真的是超级大的。

网上购票,原来那么容易的。时代真是进步好快。

晚上去一间甜品店吃晚餐。很可怜,小乡巴佬叫的食物都卖完了。
明明就没什么货,还学人家开店开到那么晚。而且脸臭臭的。
大城市的服务态度怎么都那么差啊,感慨感慨。

花生糊是不是其实很容易做的啊,拿花生酱加水煮就行了?
不然作末花生糊,在 receipt 上面竟然是写 “PEANUT BUTTER”。。。

看电影。乡巴佬第一次网上购票,还以为买到很好的位子。
结果,原来买倒反了。。。所以两个乡巴佬坐在前面前面第二排,一起仰望电影。

“This shit takes off very slowly, it’s a little awkward, goodbye.” — quoted Paul

笑死。


星期一,拿了 leave 的工作日,
两个乡巴佬靠着新科技,一个叫鸡屁爱死的东西,一起去了三位累滚。
其他朋友都只买便宜的蓝表,只有乡巴佬傻傻买贵的 oren 表。

玩水,玩车,玩桥。今天大家都有自己的人生大突破!
大乡巴佬人生突破:被大水桶泼!
小乡巴佬人生突破:走大吊桥!还有坐水龙沟轮胎船。

这里的食物竟然比云顶还贵。我一直都以为云顶的东西是最贵的了。
乡巴佬来打城市,才知道鸡饭是 RM15 一碟的。 @。@

走着走着,又累了。看到附近有东西卖都不能买。
可怜,两个乡巴佬,在大城市走,没钱,不能买吃的。

本来计划的不肥餐被小乡巴佬的城市朋友吃倒闭了,所以晚上去吃韩国餐。
真是的,大家偷偷庆祝小乡巴佬的生日,结果大乡巴佬也不被拖进去庆祝了。

生日快乐~


星期二,小乡巴佬要返乡了。早上就去吃久违了的芝麻糊。
早生贵子,早生胡子。边吃边偷看旁边停小红的 “帅哥”。

去洗照片,结果乡巴佬不会用洗照片的机器,
所洗了两张大大张的照片。多给了几块钱。笨拙死了。

然后还去挤 frozen yogurt ,以为挤了一点点应该没有超过 100 gram,
哪里知道挤到了十多块去。而且招牌口味竟然是臭酸的口味。= =+
乡巴佬果然就是不懂欣赏大城市的健康口味。
还是 chocolate 跟 vanilla 比较好吃。

上楼梯,发现上错楼梯,又下回去。
这种事情好像不是第一次做了。哈哈~

去机场坐巴士回。返乡去。


有缘再见。

Curtin Alumni

几个星期前,妈妈告诉我有 Curtin 的信寄到家里去。
都毕业那么久了,竟然还有信?

然后几天前因为全家去清明,
所以妈妈把信贷了上来给我。

大老远寄来的 Air Mail wor~~ 几有心下。
打开来看看,内容简短明了。

里面还有一个礼物~
就是。。。当当当~~~

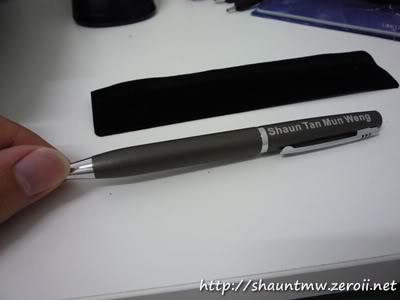
很漂亮精致的钢笔~而且后面还刻有我的名字呢~~~~

整个就是很 professional 酱。


这个故事告诉我们,有时候做些 survey 也不是没有报酬的。
哈哈哈~~~

各位 Curtin 的学弟学妹~以后多多努力做 survey 吧~
虽然很多时候还真的很懒惰一下的。
毕竟 Curtin 的 survey 全部都很花时间,问题多到比考试还多那种。。。
:-S

想当年,Alan 还因为 survey 赢到一个 iPod Touch,超级羡慕的。

珍珠

真的是越来越 “久远” 了。到现在我竟然都还在 post 很久以前的东西。
>”< 还剩最后几篇罢了,加油~ 今天的主题是,珍珠~ (不是珍珠奶茶的珍珠,是真的珍珠)
看到那些一粒一粒的 pimples 吗?那些其实就是珍珠来的。
不过这些都还不够大,他们牺牲一只,err… la-la?whatever 啦。
他们牺牲一只来给我们看看而已。
要养成一粒真正够大的珍珠要好几年呢。

据我之前读过的知识,珍珠的形成其实是,
把一粒沙粒放进 la-la 里面,(不是真的是用 la-la 啦,只是我忘记是什么动物了。 = =+)
然后经过长年累月,他的壳里面的矿物质都附在沙粒上面了,
就慢慢形成了珍珠。好像渡银那样,只不过不是银。

因为珍珠是可以养的,不像玉石,紫砂等不可循环资源,
所以相比之下,比较便宜很多。

那么多条,手放下去冰冰凉凉的很爽。

一排排的珍珠,全部放出来给人选。

全部看起来都大同小异的,都不懂他们选什么要选那么久。
他们说虽然每个珍珠看起来都差不多,其实都很不一样的,都很 unique。
就像人的指纹那样,就算找到两颗一模一样的,都一定会有一点点不同。
形状,重量,半点,表面等等。。。
可是我看来根本全部都一样。@_@


分辨珍珠真假的方法:
1)磨一磨,真的珍珠会磨出粉,就是珍珠粉。(可是会把部分珍珠磨掉,心痛。= =+)
2)拿热灯照一照,真的珍珠会保持冰冰凉凉。
3)仔细看一看,真的珍珠是不可能 perfect 毫无瑕疵的。真的珍珠一定不是很圆很圆,而且很有可能会有一两点黑点像斑点酱。


他们还有卖做成动物形状的珍珠。都不懂会有谁要买。又不美又不便宜。= =+

珍珠猫,珍珠狗。下面还有:

珍 “猪” !!!